不必太纠结于当下,也不必太忧虑未来,当你经历过一些事情的时候,眼前的风景已经和从前不一样了。——村上春树
写在前面 不必太纠结于当下,也不必太忧虑未来,当你经历过一些事情的时候,眼前的风景已经和从前不一样了。——村上春树
当前默认已经安装了 docker 而且配置了仓库地址
redis 容器化部署 下载最新 Redis 镜像
1
2
3
4
5
6
7
8
9
10
11
[root@ecs-hce hce-x86-server] Using default tag: latest latest: Pulling from library/redis 6f28985ad184: Pull complete 60e8b46025d8: Pull complete 122fe26e50b0: Pull complete de3ca1eb2e20: Pull complete 4813a7e5bd57: Pull complete 99dd8d3a66f2: Pull complete Digest: sha256:c82cacd2eee119e912ad61abe2a60b2ee728ef06fbb3c0fa1555728e4188bc69 Status: Downloaded newer image for redis:latest
查看镜像
1
2
3
4
[root@ecs-hce ~] REPOSITORY TAG IMAGE ID CREATED SIZE hce/hce-x86-server 202401 7b8fb730c9f6 2 minutes ago 518MB redis latest a617c1c92774 2 years ago 105MB
启动 Redis 容器,注意这里我们指定了运行容器名字为redis-sys,默认情况下,同一网络,docker 会自动把当前容器名字写入 DNS 映射。
1
2
[root@ecs-hce ~] 97cf7d59fd8a40ccb370c3c899e680d744bbcc38b621182fad4c1e33fe81907c
查看容器
1
2
3
4
[root@ecs-hce ~] CONTAINER ID IMAGE COMMAND CREATED STATUS PORTS NAMES 97cf7d59fd8a redis "docker-entrypoint.sâ¦" 5 seconds ago Up 4 seconds 0.0.0.0:6379->6379/tcp redis-sys ad84d6222925 hce/hce-x86-server:202401 "/bin/bash" 2 minutes ago Up 2 minutes festive_matsumoto
进入 Redis 容器,进入 Redis 客户端,Redis 部署成功确认
1
2
3
4
5
[root@ecs-hce ~] root@97cf7d59fd8a:/data 127.0.0.1:6379> root@97cf7d59fd8a:/data [root@ecs-hce ~]
Postgresql 容器化部署 拉取 Postgresql 镜像
1
2
3
4
5
6
7
8
9
10
11
12
13
14
15
16
17
18
[root@ecs-hce ~] 13: Pulling from library/postgres 6f28985ad184: Already exists 163a60947b3a: Pull complete 1791984387e5: Pull complete ccf9c39579c4: Pull complete 1d8dd50a5ee9: Pull complete 3991abc55a94: Pull complete 4cf2cdef0857: Pull complete ed1bec410498: Pull complete 0930368b9a14: Pull complete a9302936fdb5: Pull complete bb3d505cd0cb: Pull complete 4f1bb2dd6f16: Pull complete 8d3f6ff7b2da: Pull complete 687caf1b1f9b: Pull complete Digest: sha256:b94ab3a31950e7d25654d024044ac217c2b3a94eff426e3415424c1c16ca3fe6 Status: Downloaded newer image for postgres:13
查看镜像
1
2
[root@ecs-hce ~] postgres 13 c5ec7353d87d 2 years ago 314MB
创建容器,这里需要我们添加的变量,不同的镜像版本变量略有不同,同样通过 name 指定 DNS 域名映射。
1
2
[root@ecs-hce ~] 8743d3c98d38c8c42db3beeb9745c4b182c9378e8a6f907a27d70709418a5390
进入数据库容器,创建数据库
1
2
3
4
5
6
7
8
9
10
[root@ecs-hce ~] root@8743d3c98d38:/ Password: psql (13.2 (Debian 13.2-1.pgdg100+1)) Type "help" for help . postgres= CREATE DATABASE postgres= root@8743d3c98d38:/
拷贝 pg_hba.conf 配置文件至本机
修改 pg_hba.conf 文件,在# IPv4 local connections:后添加以下内容,并保存
pg_hba.conf 文件用于配置客户端对 PostgreSQL 数据库的连接权限,最后一行配置了一条规则,允许来自任意 IP 地址(0.0.0.0/0)的所有用户(all)以 “trust” 方式进行身份验证访问所有的数据库(all)
1
2
3
[root@ecs-hce ~] [root@ecs-hce ~] host all all 0.0.0.0/0 trust
将 pg_hba.conf 文件拷贝回容器,进入容器,重启 postgresql 并使配置生效
1
2
3
4
5
6
[root@ecs-hce ~] [root@ecs-hce ~] root@8743d3c98d38:/ postgres@8743d3c98d38:/$ ./usr/lib/postgresql/13/bin/pg_ctl restart waiting for server to shut down....[root@ecs-hce ~] [root@ecs-hce ~]
安装 git,获取项目数据 1 2 [root@ecs-hce ~] Failed to set locale, defaulting to C.UTF-8
创建 code 目录并进入,拉取代码及数据文件
1 2 3 4 5 6 7 8 9 10 [root@ecs-hce ~] [root@ecs-hce ~] [root@ecs-hce code] Cloning into 'oasys' ... remote: Enumerating objects: 1238, done . remote: Counting objects: 100% (1238/1238), done . remote: Compressing objects: 100% (971/971), done . remote: Total 1238 (delta 213), reused 1212 (delta 202), pack-reused 0 Receiving objects: 100% (1238/1238), 39.24 MiB | 58.15 MiB/s, done . Resolving deltas: 100% (213/213), done .
拷贝 SQL 数据文件至 PG 容器,并且进入容器导入数据
1 2 3 4 5 6 [root@ecs-hce code] [root@ecs-hce code] [root@ecs-hce code] root@8743d3c98d38:/ root@8743d3c98d38:/
部署 Springboot 项目 下载 JDK 和 HCE 镜像包
1 2 3 4 5 6 7 8 9 10 11 12 13 14 15 [root@ecs-hce code] [root@ecs-hce java] --2024-02-07 00:37:07-- https://sandbox-expriment-files.obs.cn-north-1.myhuaweicloud.com/20220411/jdk-8u321-linux-x64.tar.gz Resolving sandbox-expriment-files.obs.cn-north-1.myhuaweicloud.com (sandbox-expriment-files.obs.cn-north-1.myhuaweicloud.com)... 114.115.192.98, 114.115.192.27, 114.115.192.163 Connecting to sandbox-expriment-files.obs.cn-north-1.myhuaweicloud.com (sandbox-expriment-files.obs.cn-north-1.myhuaweicloud.com)|114.115.192.98|:443... connected. HTTP request sent, awaiting response... 200 OK Length: 146815279 (140M) [application/gzip] Saving to: 'jdk-8u321-linux-x64.tar.gz' jdk-8u321-linux-x64.tar.gz 100%[===========================================>] 140.01M 1.24MB/s in 39s 2024-02-07 00:37:46 (3.59 MB/s) - 'jdk-8u321-linux-x64.tar.gz' saved [146815279/146815279] [root@ecs-hce java] [root@ecs-hce java]
获取 Java 程序包
1 2 3 4 5 6 7 8 9 10 11 12 [root@ecs-hce java] --2024-02-07 00:39:11-- https://sandbox-expriment-files.obs.cn-north-1.myhuaweicloud.com/20220412/oasys-0.0.1-SNAPSHOT.jar Resolving sandbox-expriment-files.obs.cn-north-1.myhuaweicloud.com (sandbox-expriment-files.obs.cn-north-1.myhuaweicloud.com)... 114.115.192.163, 114.115.192.98, 114.115.192.27 Connecting to sandbox-expriment-files.obs.cn-north-1.myhuaweicloud.com (sandbox-expriment-files.obs.cn-north-1.myhuaweicloud.com)|114.115.192.163|:443... connected. HTTP request sent, awaiting response... 200 OK Length: 43206230 (41M) [application/java-archive] Saving to: 'oasys-0.0.1-SNAPSHOT.jar' oasys-0.0.1-SNAPSHOT.jar 100%[===========================================>] 41.20M 184MB/s in 0.2s 2024-02-07 00:39:12 (184 MB/s) - 'oasys-0.0.1-SNAPSHOT.jar' saved [43206230/43206230]
创建 Docker 网络 创建了一个名为 “oa-net” 的 Docker 网络。该命令返回一个长字符串作为网络标识符
1 2 3 4 [root@ecs-hce java] 8858411315a892cd61bbe8b31411595dd8b013792fd05ab68806f3ca5572c3a7 [root@ecs-hce java] [root@ecs-hce java]
将名为 “postgres” 的容器连接到 “oa-net” 网络中。这将使 “postgres” 容器能够与 “oa-net” 网络中的其他容器进行通信。
将名为 “redis-sys” 的容器连接到 “oa-net” 网络中。这样, “redis-sys” 容器也可以与 “oa-net” 网络中的其他容器进行通信。
通过上面的方式连接之后,即可以通过容器名字作为域名直接访问容器对应的服务,在最开始的版本中,docker 会在 hosts 文件主动写入映射关系,从 Docker 1.11 版本开始,Docker 不再将容器的 DNS 映射关系写入宿主机的 /etc/hosts 文件
修改 jar 包配置文件,使用 vim 打开 jar 包,这里主要修改对应的 PG 和 redis 地址
1 2 3 [root@ecs-hce java] [root@ecs-hce java] [root@ecs-hce java]
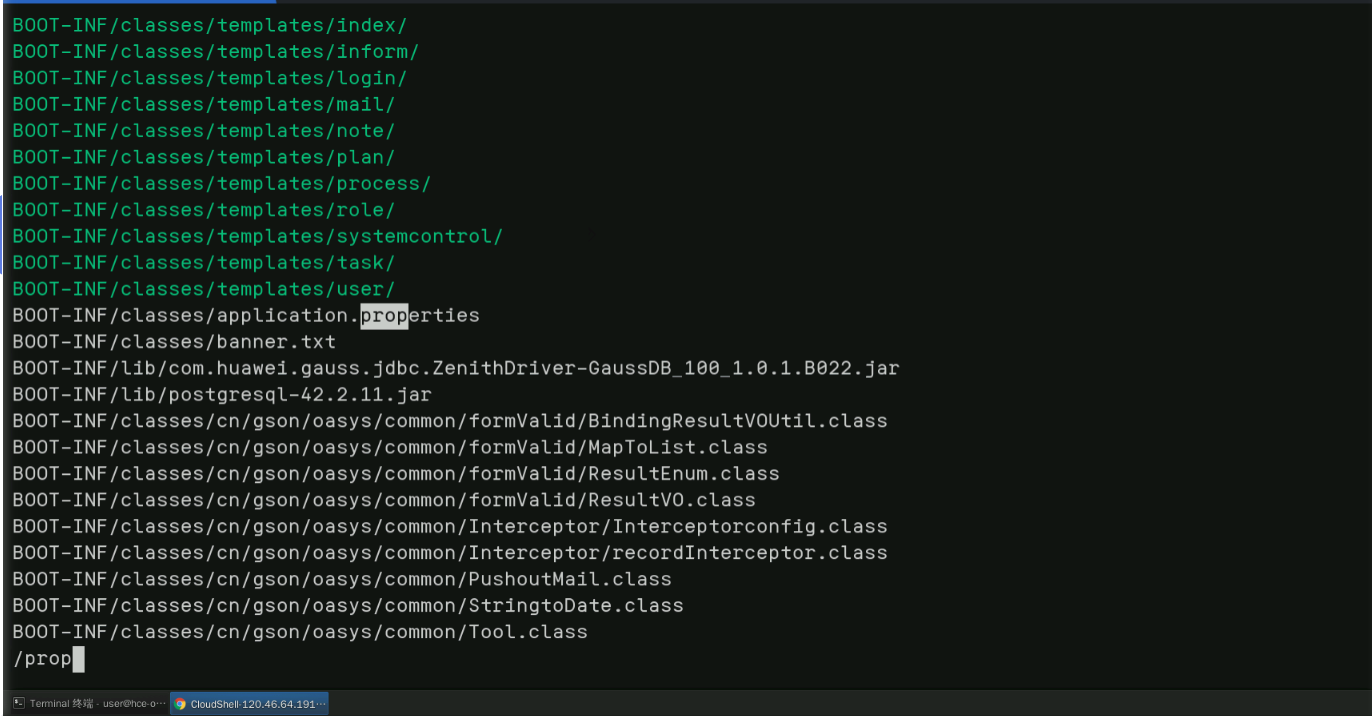
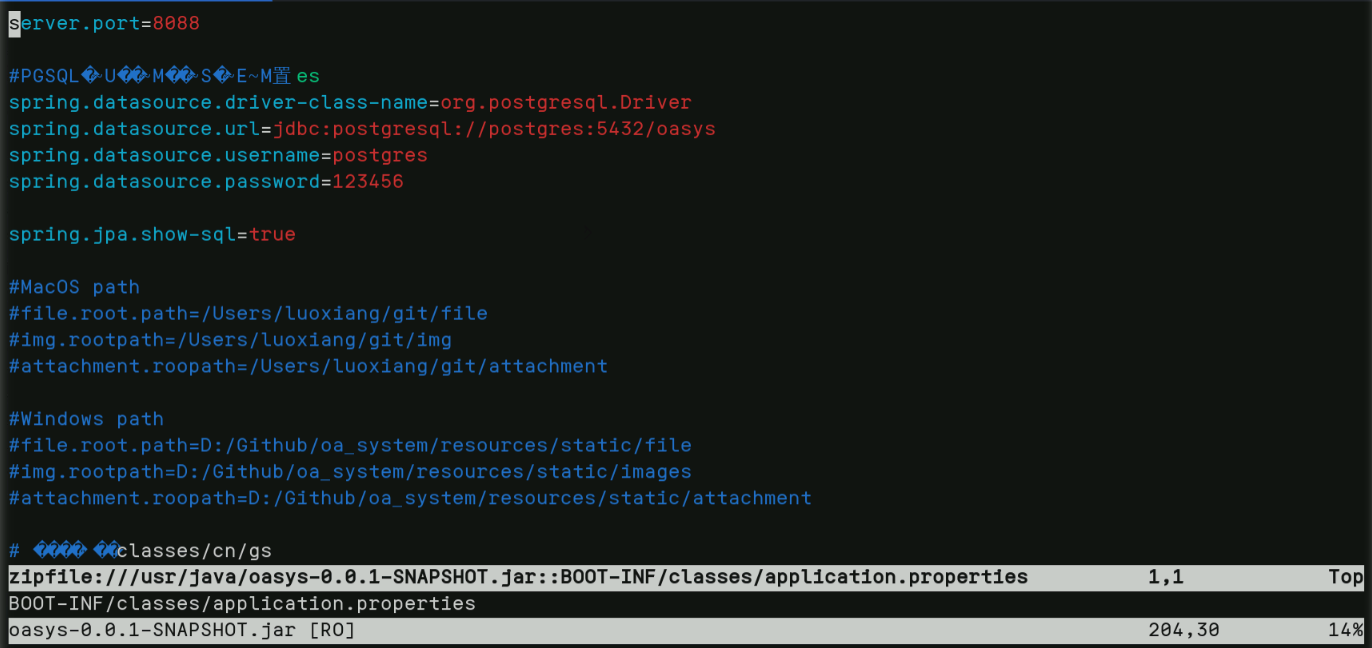
输入 /application.properties 搜索该文件,并敲回车键 2 次进入该文件
修改spring.datasource.url地址为jdbc:postgresql://postgres:5432/oasys,修改spring.redis.host 地址为redis-sys
创建 Dockerfile 1 2 3 4 5 6 7 8 9 10 11 12 [root@ecs-hce java] [root@ecs-hce java] FROM hce/hce-x86-server:202401 WORKDIR /home COPY jdk1.8 /home/java COPY oasys-0.0.1-SNAPSHOT.jar /home ENV JAVA_HOME=/home/java ENV PATH=$JAVA_HOME /bin:$PATH ENV CLASSPATH=.:$JAVA_HOME /lib/dt.jar:$JAVA_HOME /lib/tool.jar EXPOSE 8088 CMD [ "java" ,"-jar" ,"oasys-0.0.1-SNAPSHOT.jar" ]
输入以下命令,创建 docker 镜像
1 2 3 4 5 6 7 8 9 10 11 12 13 14 15 16 17 18 19 20 21 22 23 24 25 26 27 28 29 30 31 32 33 34 [root@ecs-hce java] Sending build context to Docker daemon 556.2MB Step 1/9 : FROM hce/hce-x86-server:202401 ---> 7b8fb730c9f6 Step 2/9 : WORKDIR /home ---> Running in 54517151e09c Removing intermediate container 54517151e09c ---> 315f482c8b50 Step 3/9 : COPY jdk1.8 /home/java ---> a2fb5d6132d2 Step 4/9 : COPY oasys-0.0.1-SNAPSHOT.jar /home ---> 1f96dbcdbcba Step 5/9 : ENV JAVA_HOME=/home/java ---> Running in 0bc3c8cc82fd Removing intermediate container 0bc3c8cc82fd ---> 778b1bc77f3d Step 6/9 : ENV PATH=$JAVA_HOME /bin:$PATH ---> Running in 559dea2ff7d0 Removing intermediate container 559dea2ff7d0 ---> 4817d8859121 Step 7/9 : ENV CLASSPATH=.:$JAVA_HOME /lib/dt.jar:$JAVA_HOME /lib/tool.jar ---> Running in b0ab0b19ad6d Removing intermediate container b0ab0b19ad6d ---> 34250c614a8c Step 8/9 : EXPOSE 8088 ---> Running in a927aa883de0 Removing intermediate container a927aa883de0 ---> 78ca8e81d9af Step 9/9 : CMD [ "java" ,"-jar" ,"oasys-0.0.1-SNAPSHOT.jar" ] ---> Running in 7b8757fd2ff4 Removing intermediate container 7b8757fd2ff4 ---> fbc537581fd1 Successfully built fbc537581fd1 Successfully tagged hce/hce_java_oa:202401
查看镜像
1 2 3 4 5 6 [root@ecs-hce java] REPOSITORY TAG IMAGE ID CREATED SIZE hce/hce_java_oa 202401 fbc537581fd1 27 seconds ago 927MB hce/hce-x86-server 202401 7b8fb730c9f6 21 minutes ago 518MB redis latest a617c1c92774 2 years ago 105MB postgres 13 c5ec7353d87d 2 years ago 314MB
启动镜像
1 2 [root@ecs-hce java] 5d8e571ddb52f3951d2c066664b4e10fde1cee8505a95cf64c60824e9c7655c3a
这里需要注意下 --network=oa-net 参数,用于将容器连接到名为 “oa-net” 的网络。
确实启动结果
1 2 3 4 5 6 [root@ecs-hce java] [root@5d8e571ddb52 home] 1 jar 63 Jps [root@5d8e571ddb52 home] [root@ecs-hce java]
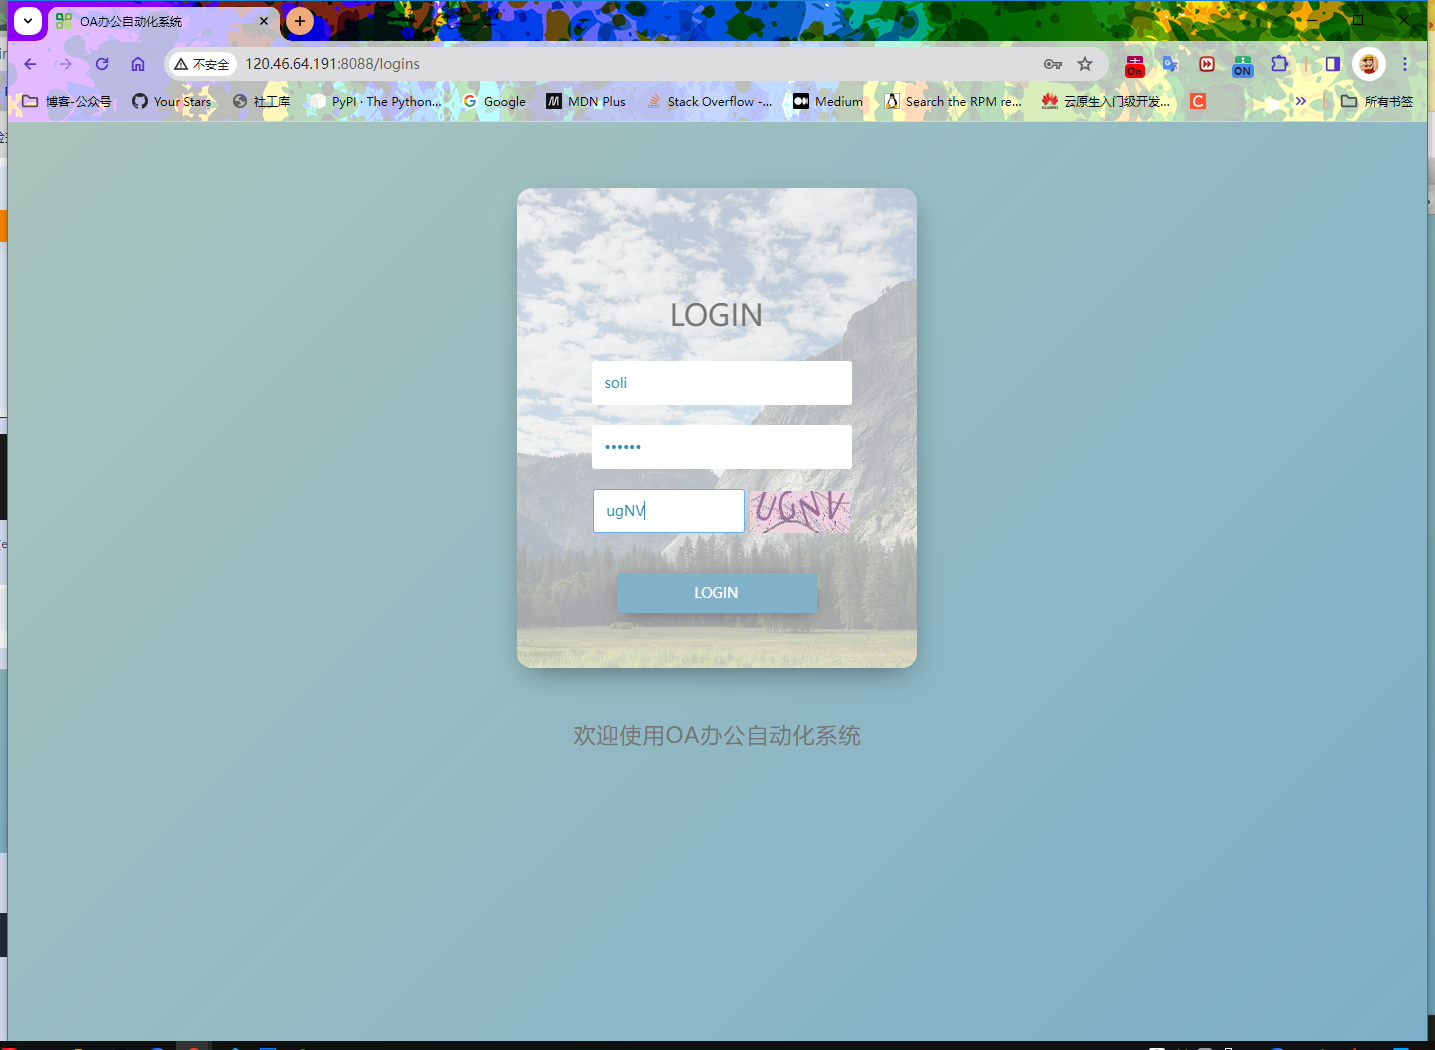
浏览器访问 oa,输入 eip:8088 访问,账号 soli,密码 123456(eip 可在华为云控制台获取)
Nginx 容器化部署并配置反向代理 1 2 [root@ecs-hce java] nginx latest 298ec0e28760 2 years ago 133MB
这里需要注意下,同样 --network=oa-net 参数,用于将容器连接到名为 “oa-net” 的网络。
1 2 3 4 [root@ecs-hce java] e0a0d8fd0a3489740e234cd9b409ffb5cfea436e76fe51e23d6b80fe3163673a [root@ecs-hce java] e0a0d8fd0a34 nginx "/docker-entrypoint.â¦" About a minute ago Up 59 seconds 0.0.0.0:80->80/tcp nginx
添加反向代理配置
1 2 3 4 5 [root@ecs-hce java] root@e0a0d8fd0a34:/ root@e0a0d8fd0a34:/etc/nginx/conf.d root@e0a0d8fd0a34:/etc/nginx/conf.d root@e0a0d8fd0a34:/etc/nginx/conf.d
1 2 3 4 5 location / { proxy_pass http://120.46.64.191:8088; }
验证文件是否配置正常, 重启 Nginx 容器
1 2 3 4 5 6 7 root@e0a0d8fd0a34:/etc/nginx/conf.d nginx: the configuration file /etc/nginx/nginx.conf syntax is ok nginx: configuration file /etc/nginx/nginx.conf test is successful root@e0a0d8fd0a34:/etc/nginx/conf.d [root@ecs-hce java] nginx [root@ecs-hce java]
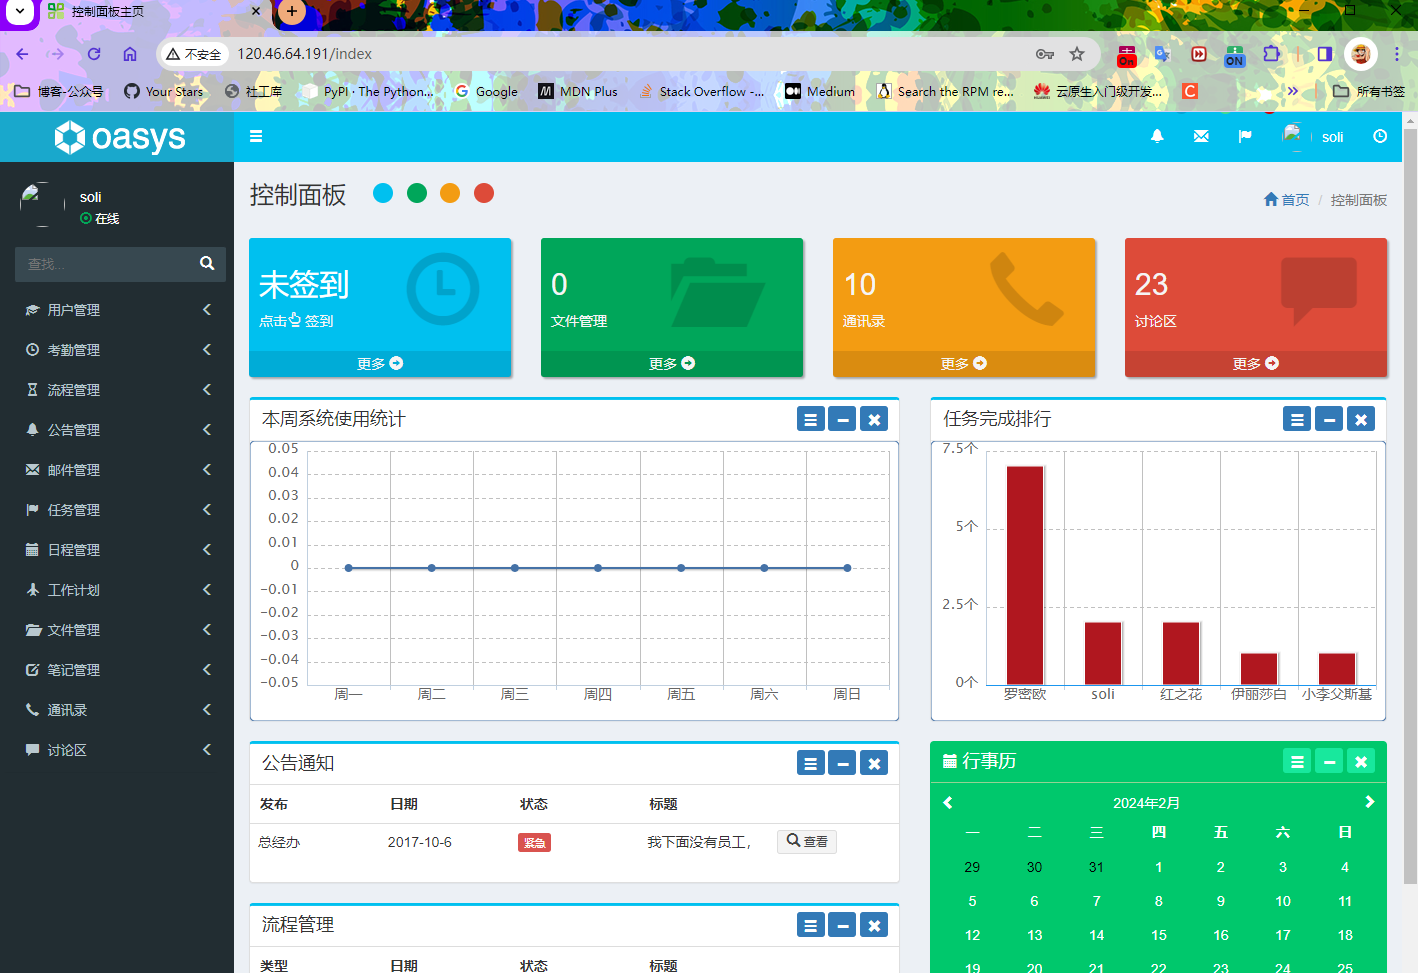
访问测试
博文部分内容参考 © 文中涉及参考链接内容版权归原作者所有,如有侵权请告知 :)
https://edu.huaweicloud.com/certificationindex/developer/9bf91efb086a448ab4331a2f53a4d3a1
© 2018-至今 liruilonger@gmail.com , All rights reserved. 保持署名-非商用-相同方式共享(CC BY-NC-SA 4.0)


